
Object-Oriented Programming (OOP) is a powerful paradigm that allows developers to write code that is modular, reusable, and easy to maintain. And when it comes to OOP, Swift is a language that is built from the ground up to support this programming style.
Whether you're an experienced programmer or just getting started with Swift, understanding OOP is essential to writing efficient, well-organized code. In this blog post, we'll explore the core concepts of OOP in Swift, including
- Classes
- Properties
- Methods
- Objects
- Access Control
- Polymorphism
- Method Overriding
- Method Overloading
- Abstraction
- Inheritance
- Encapsulation
By the end of this post, you'll have a solid understanding of how OOP works in Swift and how to use it to build better software.
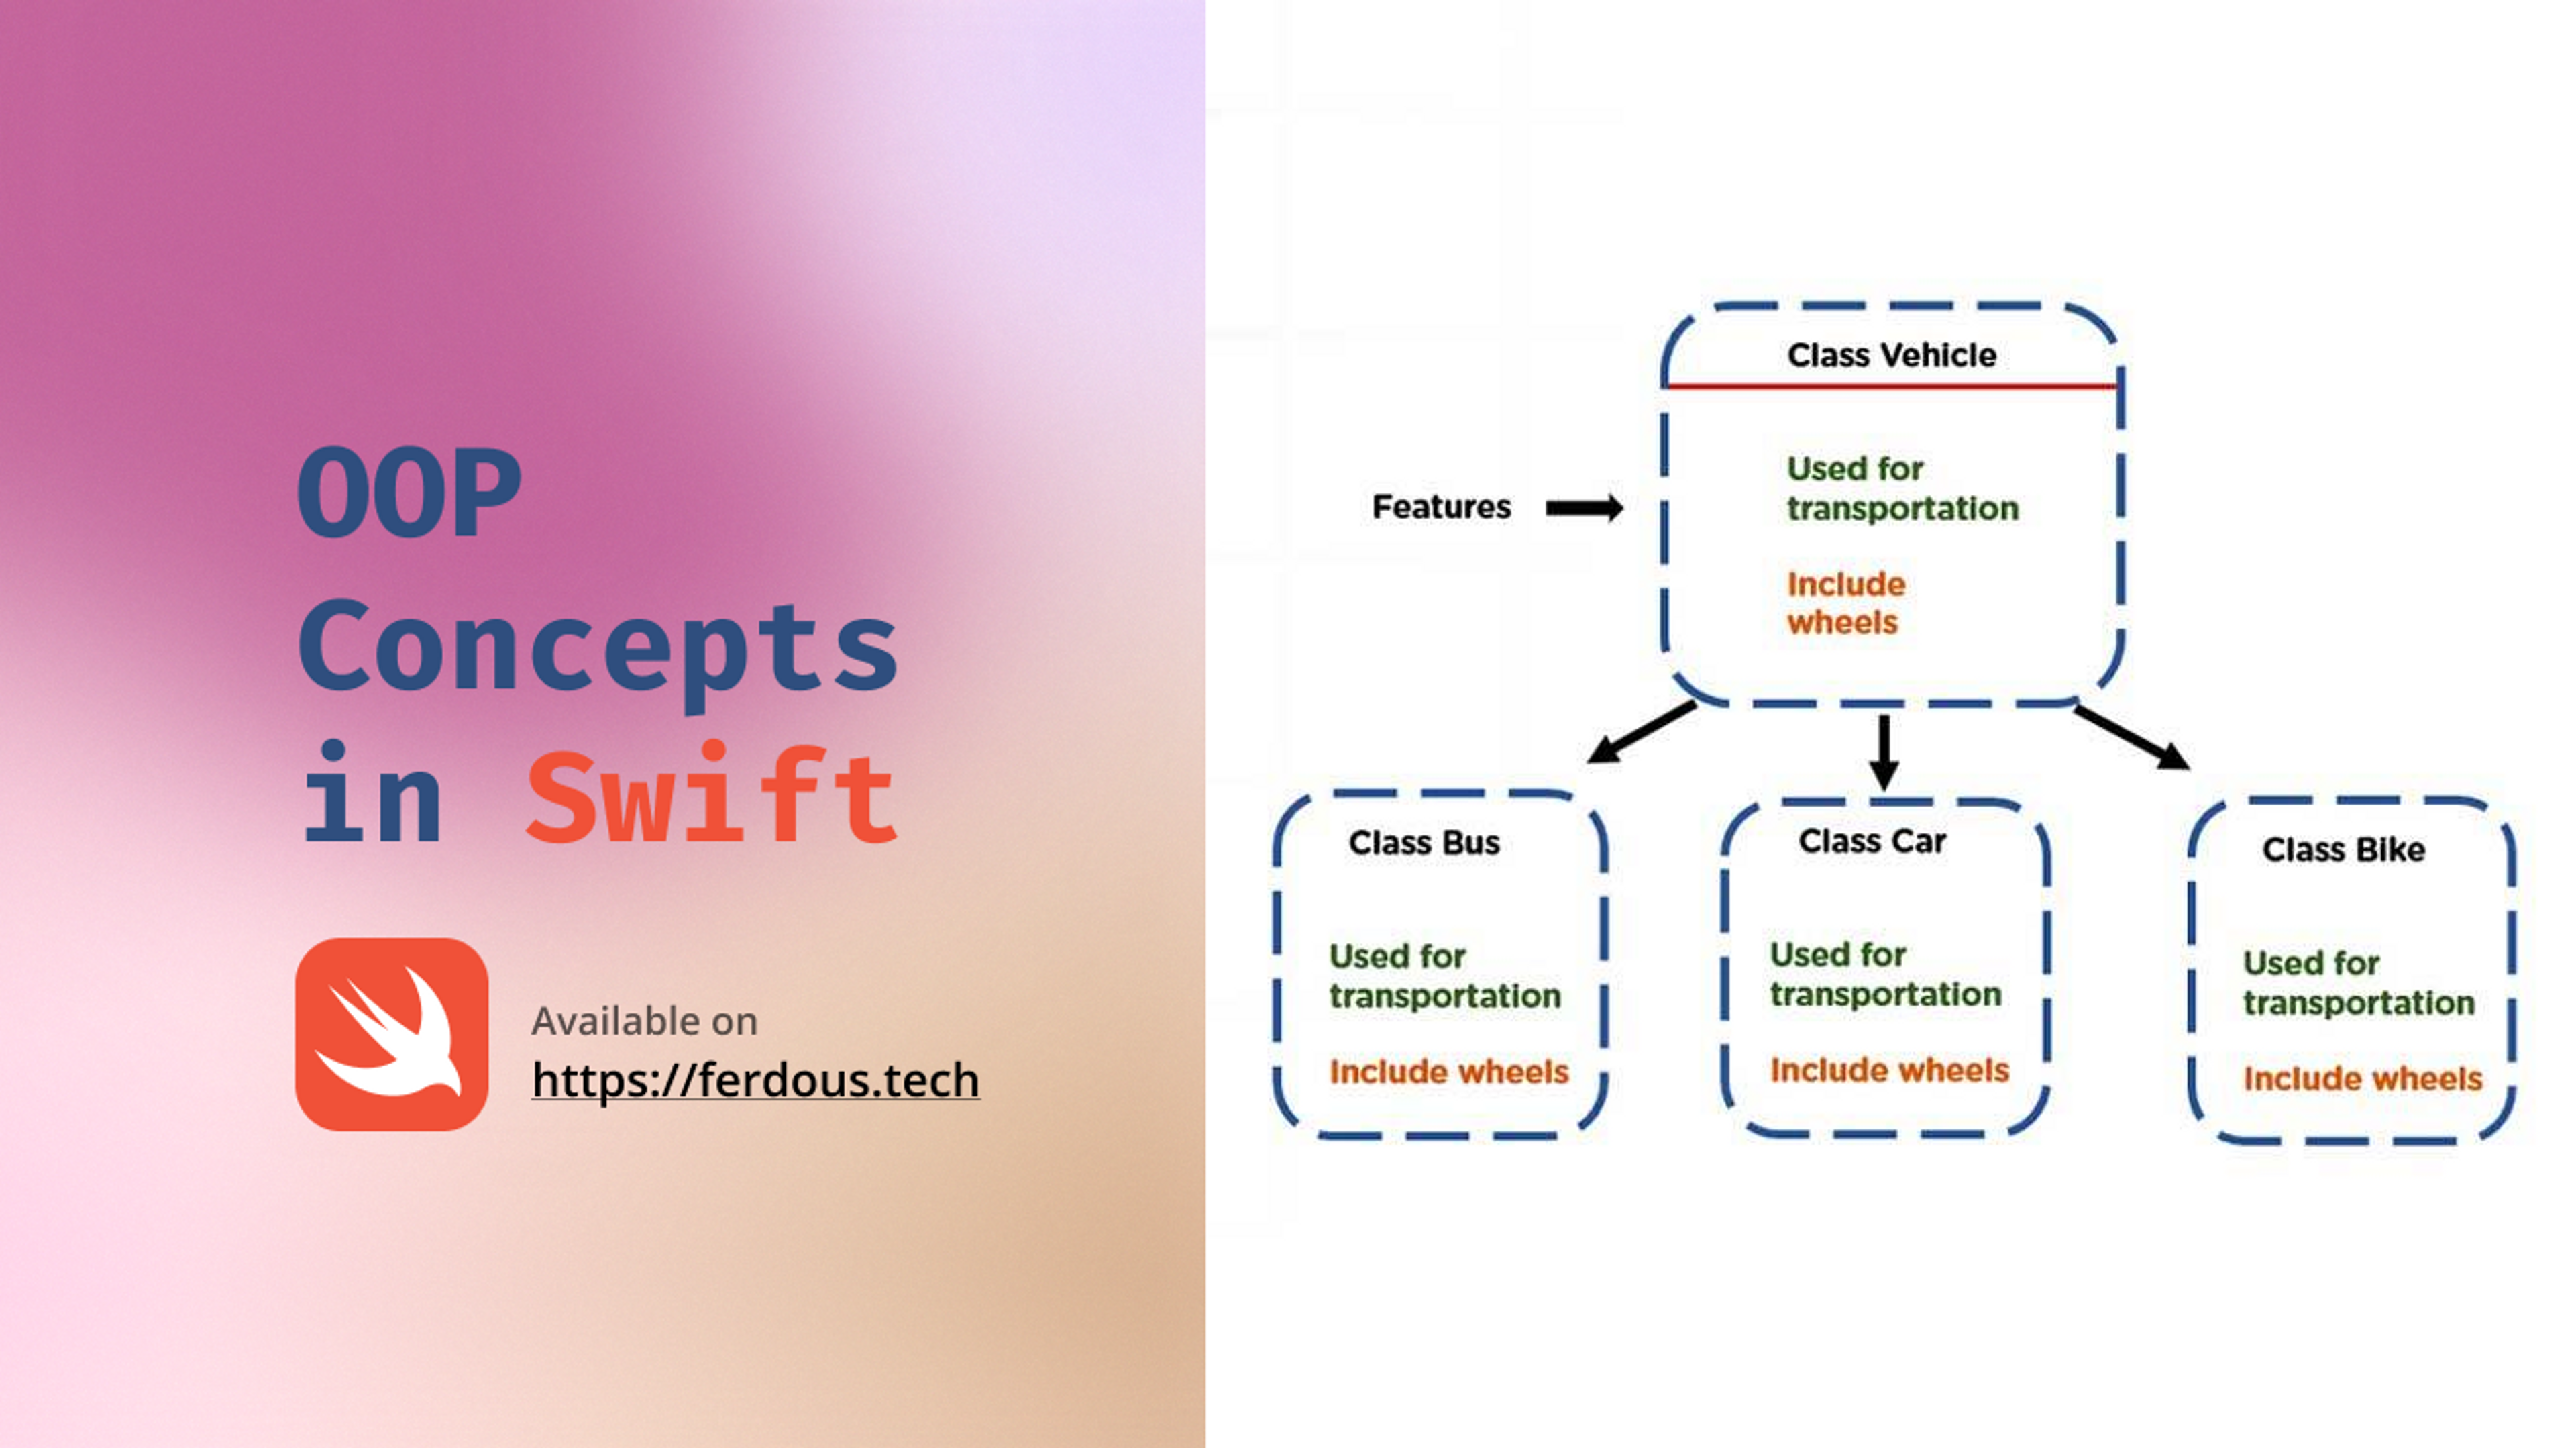
Classes
In Swift, a class is a blueprint or template for creating objects that encapsulate data and behavior. Just like how a blueprint for a house contains information about the structure and layout of the house, a class in Swift defines the properties and methods that an object will have.
Let's take the example of a Vehicle class in Swift to illustrate how classes work in Swift. Let's define Vehicle class.
class Vehicle {
    var make: String
    var model: String
    var year: Int
    var color: String
    var isRunning: Bool

    init(make: String, model: String, year: Int, color: String) {
        self.make = make
        self.model = model
        self.year = year
        self.color = color
        self.isRunning = false
    }

    func start() {
        if !isRunning {
            isRunning = true
            print("\(make) \(model) is now running.")
        } else {
            print("\(make) \(model) is already running.")
        }
    }

    func stop() {
        if isRunning {
            isRunning = false
            print("\(make) \(model) has been stopped.")
        } else {
            print("\(make) \(model) is already stopped.")
        }
    }
}
To define a class in Swift, we use the `class` keyword followed by the class name, and enclose the class's properties and methods between a pair of curly braces.
Properties
A property is a value or data that is stored within an object of a class. It can be accessed and modified by the methods within the class. Properties can be defined using the `var` or `let` keyword followed by the property name and its data type.
Let's discuss properties for our given class example:
- make: A string property that represents the make of the vehicle.
- model: A string property that represents the model of the vehicle.
- year: An integer property that represents the year the vehicle was made.
- color: A string property that represents the color of the vehicle.
- isRunning: A boolean property that represents whether the vehicle is currently running or not.
Methods
A method is a function that is defined within a class and can be called to perform some action or computation on the class's data. They are defined using the `func` keyword followed by the method name, its input parameters in parentheses, and its return type (if any).
Let's discuss properties for our given class example:
- init(make: String, model: String, year: Int, color: String): A constructor or initializer method that initializes the make, model, year, and color properties of the vehicle, and sets the isRunning property to false by default.
- start(): A method that starts the vehicle and prints a message indicating that the vehicle is now running. If the vehicle is already running, the method prints a message indicating that the vehicle is already running.
- stop(): A method that stops the vehicle and prints a message indicating that the vehicle has been stopped. If the vehicle is already stopped, the method prints a message indicating that the vehicle is already stopped.
Objects
In Swift, an object is an instance of a class or a struct. It is a variable that contains both data (in the form of properties) and behavior (in the form of methods).
We can create objects of type `Vehicle` and access their properties and methods. For example, we can create a `car` object like this for the previous example.
let car = Vehicle(make: "Honda", model: "Civic", year: 2021, color: "Red")When you create this object, you create a unique instance of a class or struct that can have its own distinct set of property values. You can interact it with by calling its methods or accessing its properties. For example,
car.start() // Output: Honda Civic is now running.
car.stop() // Output: Honda Civic has been stopped.
Access Control
Access control in Swift is a feature that allows you to restrict access to certain parts of your code from other parts. It helps you to keep your code organized, secure, and easy to maintain by preventing unauthorized access to critical parts of your code.
In Swift, you can control the access to classes, structs, enums, properties, methods, and other parts of your code using five access levels:
- Open: This access level in Swift is a modifier that is higher than the public access level. It allows you to mark a class or a class member as "open" to indicate that it can be subclassed or overridden by code outside of the module where it is defined.
- Public: This is the highest level of access, and it allows you to access the code from anywhere in your project or from outside your project. Classes, methods, properties, and other codes that you mark as public can be accessed by any code that can see the module they are defined in.
- Internal: This is the default access level in Swift, and it allows you to access the code from within the module it is defined in. Code that is marked as internal can be accessed from any file within the same module.
- File Private: This access level restricts the access to code within the same file. Code that is marked as file private can be accessed only within the same file where it is defined.
- Private: This is the most restrictive access level, and it allows you to access the code only within the enclosing scope. Code that is marked as private can be accessed only within the same type or function where it is defined.
For example,
open class Vehicle {}
public class Train {}
internal clas Bus {}
fileprivate class Car {}
private class Bike {}

class SomeInternalClass {}              // implicitly internal
let someInternalConstant = 0            // implicitly internal
Polymorphism
Polymorphism is the ability of objects to take on multiple forms or behaviors. In Swift, polymorphism is achieved through two mechanisms:
- Method overloading
- Method overriding
Method Overloading
Method overloading allows us to define multiple methods with the same name, but with different parameters. In Swift, we can overload methods by changing the number, type, or order of the parameters.
For example, we can add a new method called `accelerate` to the `Vehicle` class that takes an additional parameter:
class Vehicle {
    var brand: String
    var model: String
    var year: Int

    init(brand: String, model: String, year: Int) {
        self.brand = brand
        self.model = model
        self.year = year
    }

    func accelerate() {
        print("The vehicle is accelerating.")
    }

    func accelerate(by speed: Int) {
        print("The vehicle is accelerating by \(speed) km/h.")
    }
}
In this example, we have defined two methods with the same name `accelerate`, but with different parameters. The first method has no parameters, while the second method takes an additional parameter `speed`.
Method Overriding
Method overriding allows a subclass to provide its own implementation of a method that is already defined in its superclass. In Swift, we can override methods by using the `override` keyword before the method definition.
For example, we can create a new subclass called Car that inherits from the Vehicle class and overrides the accelerate method:
class Car: Vehicle {
    override func accelerate() {
        print("The car is accelerating.")
    }
}
In this example, we have created a subclass called Car that inherits from the Vehicle class and overrides the accelerate method with its own implementation. Now, if we create an instance of Car and call the accelerate method, it will print "The car is accelerating." instead of "The vehicle is accelerating.":
let myCar = Car(brand: "Toyota", model: "Corolla", year: 2022)
myCar.accelerate() // Output: The car is accelerating.
Note that we have used the override keyword before the method definition to indicate that we are overriding the superclass method. If we try to override a method that is not marked as open or public, we will get a compile-time error.
Abstraction
Abstraction is an OOP concept by which we expose relevant data and methods of an object hiding its internal implementation. For example,
// Vehicle class with an abstract method
class Vehicle {
    func start() {
        fatalError("Abstract method must be overridden")
    }
}

// Car class that implements the start() method
class Car: Vehicle {
    override func start() {
        print("Starting the car")
    }
}

// Motorcycle class that implements the start() method
class Motorcycle: Vehicle {
    override func start() {
        print("Starting the motorcycle")
    }
}

// Usage
let car = Car()
let motorcycle = Motorcycle()

car.start() // "Starting the car"
motorcycle.start() // "Starting the motorcycle"
In this example, the Vehicle class defines an abstract `start()` method that must be overridden by any concrete subclass. The Car and Motorcycle classes both inherit from Vehicle and provide their own implementations of the start() method.
By defining the abstract start() method in the Vehicle class, we've abstracted away the specific details of starting a vehicle. This allows us to create multiple subclasses that provide their own implementations, while still adhering to a common interface. This makes it easier to work with different types of vehicles in a more generic way, without worrying about the specifics of how they're started.
Inheritance
Inheritance is a process by which a child class inherits the properties of its parent class. For example,
// Vehicle class with properties and a method
class Vehicle {
    var make: String
    var model: String

    init(make: String, model: String) {
        self.make = make
        self.model = model
    }

    func drive() {
        print("Driving the \(make) \(model)")
    }
}

// Car class that inherits from Vehicle
class Car: Vehicle {
    var numDoors: Int

    init(make: String, model: String, numDoors: Int) {
        self.numDoors = numDoors
        super.init(make: make, model: model)
    }

    override func drive() {
        print("Driving the \(numDoors)-door \(make) \(model)")
    }
}

// Usage
let vehicle = Vehicle(make: "Honda", model: "Civic")
let car = Car(make: "Toyota", model: "Corolla", numDoors: 4)

vehicle.drive() // "Driving the Honda Civic"
car.drive() // "Driving the 4-door Toyota Corolla"
In this example, the Vehicle class defines a make and model property, as well as a drive() method. The Car class inherits from Vehicle and adds a numDoors property, as well as overriding the `drive()` method to include the number of doors in the output.
By inheriting from the Vehicle class, the Car class is able to reuse its properties and methods, while also adding its own unique functionality. This allows us to create more specialized subclasses that build on top of more general ones, while still maintaining a common interface.
Encapsulation
Encapsulation is to keep the internal details of an object hidden from the outside world and provides a controlled way to access and modify its internal state. For example,
// Vehicle class with private properties and a public method
class Vehicle {
    private var make: String
    private var model: String

    init(make: String, model: String) {
        self.make = make
        self.model = model
    }

    func drive() {
        print("Driving the \(make) \(model)")
    }

    // Getter for make property
    func getMake() -> String {
        return make
    }

    // Setter for make property
    func setMake(_ make: String) {
        self.make = make
    }
}

// Usage
let vehicle = Vehicle(make: "Honda", model: "Civic")
vehicle.drive() // "Driving the Honda Civic"
print(vehicle.getMake()) // "Honda"
vehicle.setMake("Toyota")
vehicle.drive() // "Driving the Toyota Civic"
In this example, the Vehicle class has two private properties: `make` and `model`. These properties are encapsulated within the class, meaning they can only be accessed or modified from within the class itself.
However, the Vehicle class also has a public method drive(), which can be called from outside the class. This method is able to access the private properties because it is defined within the same class.
To allow external access to the make property, the Vehicle class also includes a public getter method getMake(), as well as a public setter method setMake(_:). These methods provide a controlled interface for accessing and modifying the encapsulated property.
By encapsulating its properties and providing a controlled interface for accessing them, the Vehicle class is able to ensure that its internal state remains consistent and that its behavior is predictable.
Finally, You finish this long journey. I appreciate your effort and passion. You can follow me on Linkedin for more iOS blogs.
Happy Coding 🚀
About Ferdous Mahmud Akash
Hey there! I'm a self-taught iOS developer from Bangladesh.
I'm also passionate about sharing my knowledge and experience with other aspiring developers through my blog at ferdousmahmud.co
Thank you for visiting my website, and feel free to reach out if you have any questions or just want to say hello!
